")


When I migrated my wordpress blog to my Showit website, I wanted to give my readers an option to use the search bar.
Now when you install a search bar on a Showit website it is only going to be related to your blog posts, as it will be under your WordPress blog.
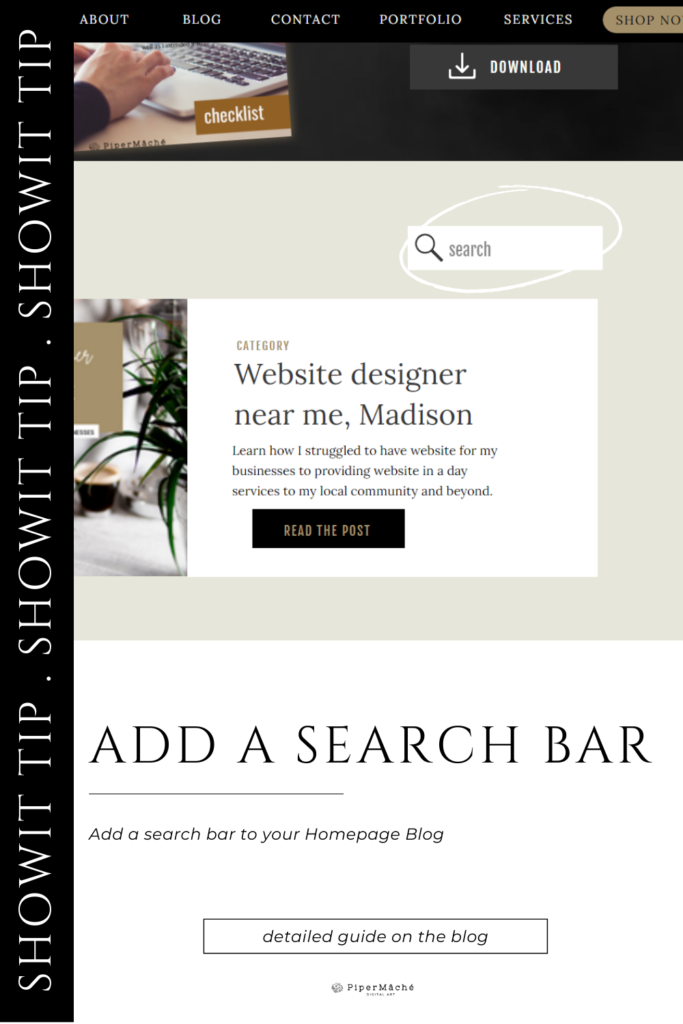
WHY IT’S IMPORTANT TO ADD A SEARCH BAR?
If you migrated your blog to Showit, you most likely already had an audience, and given your blog is most likely not going to be looking the same, you want to give your audience a way to find things easier so they can check what’s familiar to them.
It also serves as an invitation for people TO READ more and increase your conversion rates. It also decreases the risk of people leaving your site.
A search bar can also improve your SEO. Google notice how much time people spend on your website and as it increases, your SEO will get stronger rankings.
WHERE TO PLACE THE SEARCH BAR
It’s important to place the search bar in a place where your audience can easily locate it. It doesn’t take a lot of space, so I decided to place mine on the top right corner.
HOW IT ADD A SEARCH BAR ON A SHOWIT BLOG HOMEPAGE
It’s very simple to add a search bar, just follow the steps below:
step 1 – add a CTA box (rectangle + text + icon if you choose) with your branding
Step 2- Select your text and under text properties select placeholder: search bar
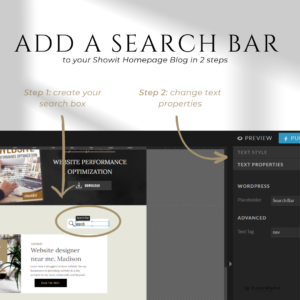
SPECIAL TIP: make sure to use a color that pops on your CTA box.
Did you like this tip? I send our tips on my newsletter, come join us.
As always, I am available to help you improve your Showit website, you can learn more about my services at www.pipermache.com/services


Comments Off on How to add Search Bar to Showit Website Blog